Busy Bags
Kelly Rojahn
In mom life, we are always looking for those hacks...those things that help make life a little easier. Insert BUSY BAGS. Have you heard of them? A busy bag is an activity for your little one to help keep them busy. For example, busy bags are extremely helpful on those LONG car rides. They are great tools to use in the stroller (ahem, Stroller Strides class!). They make a great Mommy and Me activity to do together sitting on the floor. And they make a great quiet time activity.If this sounds up your alley, keep reading! We've shared our top favorite busy bags (from personal experience) AND how they are beneficial to child development. An activity for entertainment and enrichment? Win, win!
Gather up your materials, add them to a gallon zip bag, and head off on an adventure with a fun, educational activity to keep your little one engaged and happy. After all, children learn through play!
1. Ice Cube Tray Busy Bag
Materials: ice cube tray, pom poms in different shapes and colors, giant plastic tweezers
With a little imagination, this simple ice cube tray can be used in a variety of ways. I.e. counting, sorting, or making a batch of pretend veggie soup (one carrot, one tomato, one pepper...). In addition to being able to use the pom poms to help practice counting, sorting (by size or color), your little one will be practicing hand-eye coordination and those fine motor skills needed to pinch and grasp. We even recommend adding in a pair of giant plastic tweezers to add to the fine motor development.
2. Threading Busy Bag
Materials: giant button, ribbon, pieces of felt, scissors, needle & thread
This busy bag is all about concentration, hand-eye coordination, and fine motor skills. Start with a piece of ribbon (ours is approximately 18 inches long). Cut your felt into shapes (we used squares but feel free to mix it up) and cut a 1 inch line in the middle of each shape. Use one of the shapes to tie to the end of the ribbon providing a barrier for future pieces from falling off the end. Next, attach the giant button to the other end of the ribbon. We recommend sewing the button on to make sure it is nice and secure. From there, your little one can take his or her time threading the giant button through the slit on the felt shapes, creating a shape caterpillar (that's what we called it at our house!).
3. Color Matching Busy Bags
We've included two ideas here! Maybe one speaks to you more than the other.
Set one materials: paint chip cards from your local home improvement store, clothespins, scissors, and hot glue.
Snip a small section of each color paint chip and hot glue it to one side of your clothespin. Let your little one practice grasping, squeezing, and placing the clothespins on the matching color chip. In addition to these fine motor skills, your little one is practicing hand-eye coordination, color recognition, and matching.
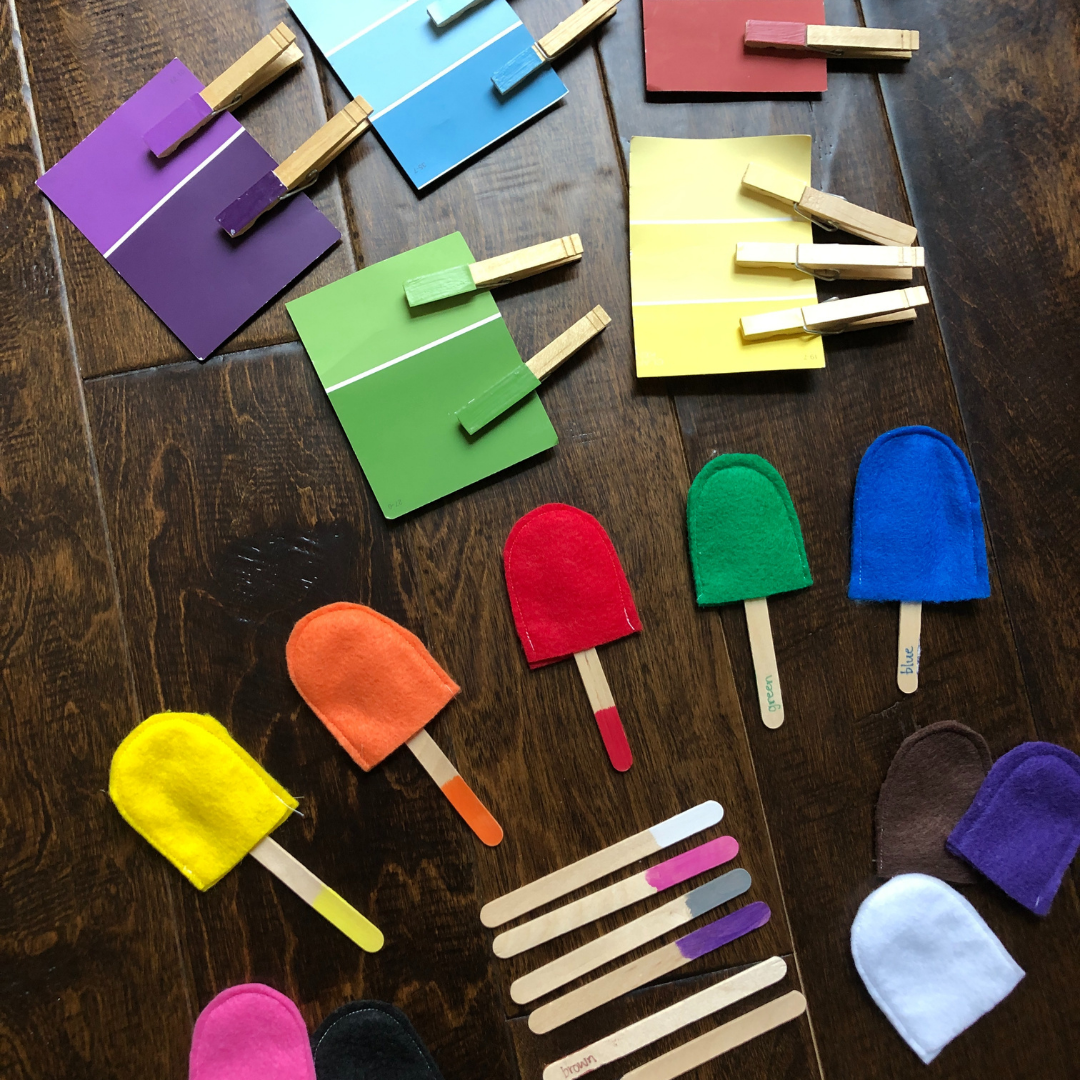
Set two materials: felt, popsicle sticks, scissors, paint, permanent markers, hot glue or a sewing machine
For this set, we are making popsicles! Cut out your popsicle shapes from your felt pieces. You will need two of each color. From here, hot glue or sew the felt pieces together, leaving the straight edge open so that the popsicle stick can slide in. On each popsicle stick, mark one end with paint or a marker to match each of your popsicles. We even recommend writing the name of the color on the other side of the popsicle. Recognizing color words will help with those early reading skills. Let your little one match the popsicle stick to the matching popsicle top by sliding the stick into the felt.
We hope these ideas bring hours of fun together learning, as well as introducing independent quiet play.